
Google Slides is a free, powerful way to create web-based slides and presentations for your Enplug displays. You can share engaging company information with external audiences, such as special promotions, and with internal audiences, such as new employee bios.
Let’s get started on using Google Slides!
Creating your digital signage for Enplug’s Web Page App with Google Slides
1. Sign into Google Drive with your Google account (free to create if you don’t have one).
2. Hit the blue “New” button in the upper left corner, and select Google Slides from the drop-down menu. A new blank presentation will be created.
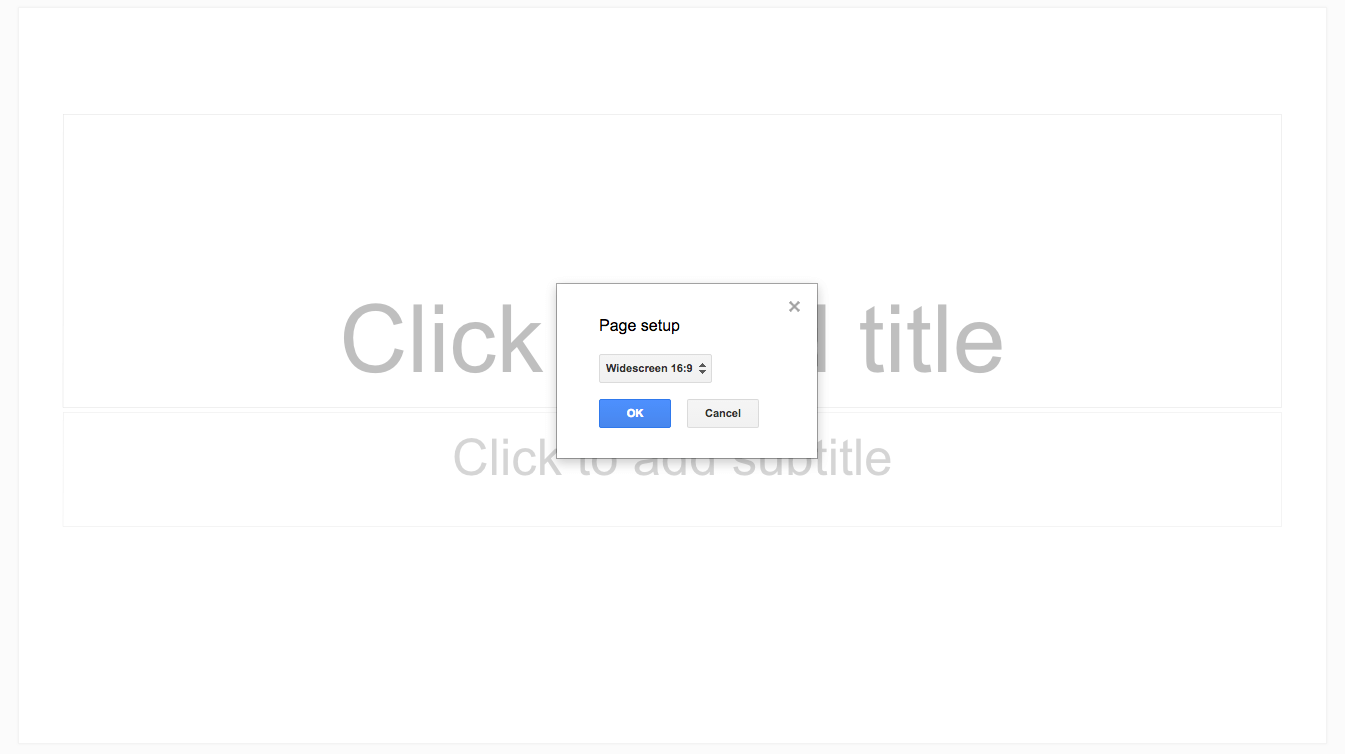
3. Go to File – Page Setup to make the slide shape match your screen. You’ll want to select “Widescreen 16:9” for a Landscape screen or use the Custom settings to make your slides 5.625″ by 10″ for a Portrait screen.
4. Select your color theme. You can select from the pre-built themes using the list on the right-hand panel, or create your own theme from scratch.
5. Add images and text to your slide, depending on the content you’d like to display. Create as many slides as you’d like.
6. Once you’ve created your digital signage graphics with Google Slides, navigate to File – Publish to the Web.
7. From the box that appears, if you have created more than one slide, choose how long each slide should play, and be sure to select “Start slideshow as soon as the player loads” and “Restart the slideshow after the last slide.”
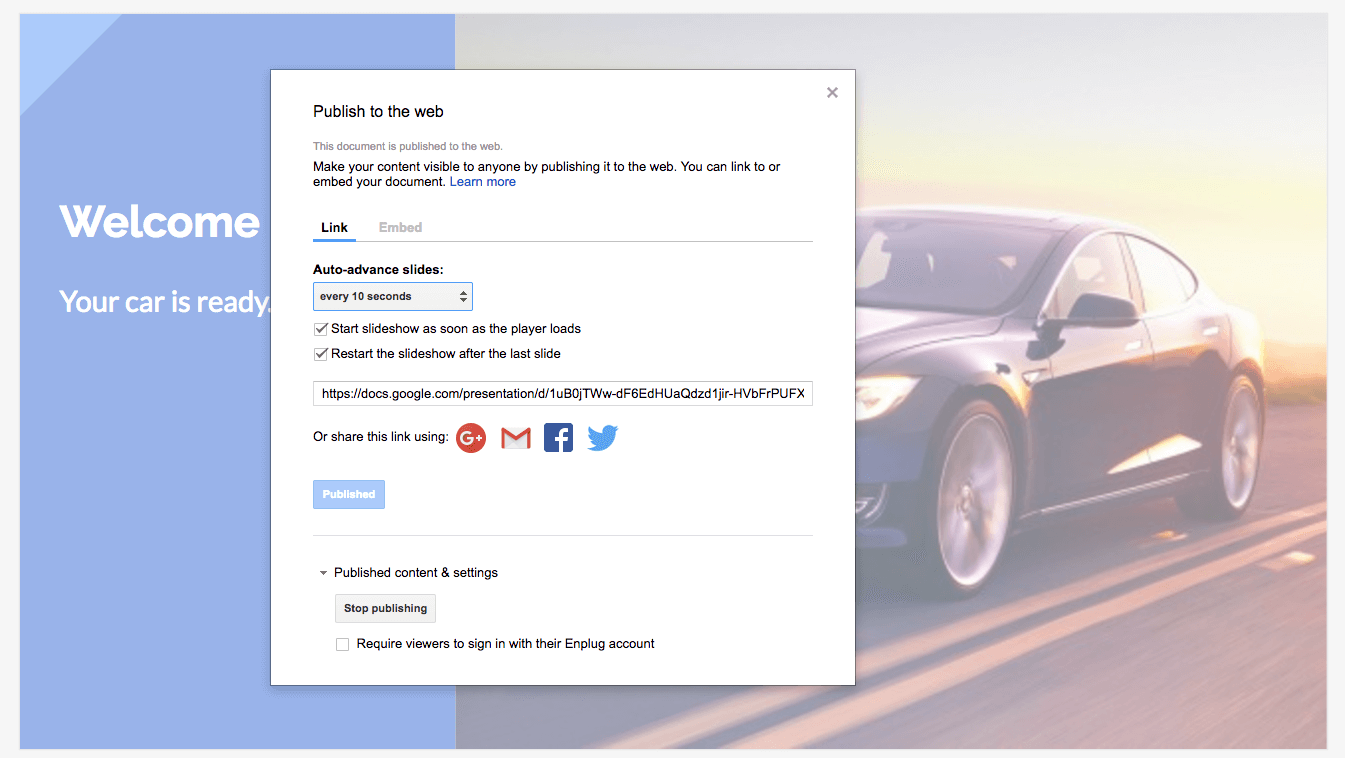
8. Click the automatically-generated link and copy it to your clipboard.
Adding your Google Slides to your Enplug displays
1. Navigate to the Enplug Dashboard and sign in.
2. Select the Enplug Web Page App and hit Add Web Page. Paste in your web page URL, give it a name, and select how long the page should play.
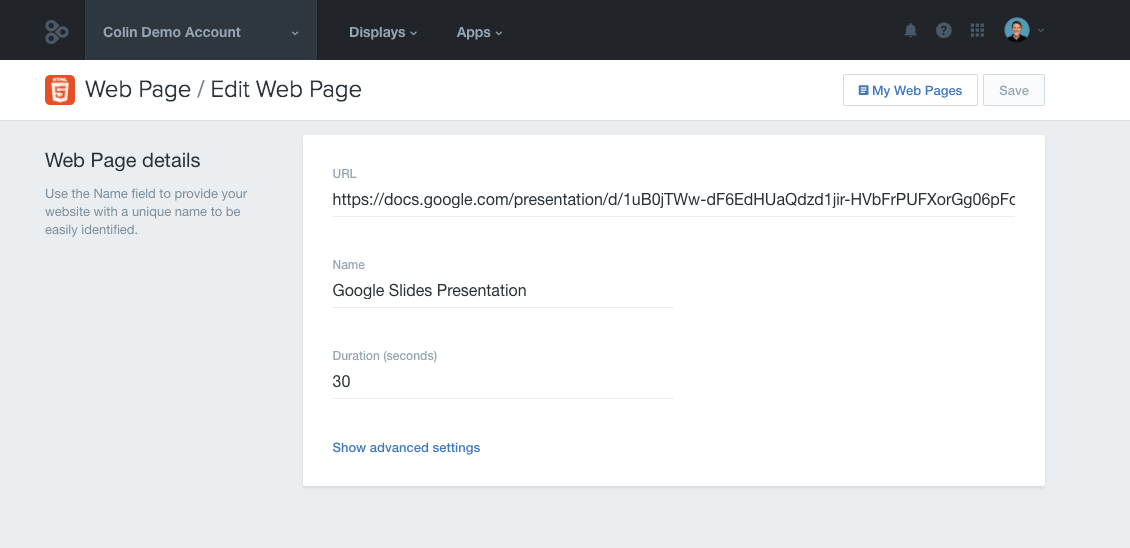
3. Click “Show advanced settings” and check the box to “reload each time page is shown.”
Tip: Set the “Preload Interval” under Advanced Settings to 5 seconds so the page shows up fully loaded and without the small toolbar that’s initially shown by default.
4. You will now see your Google Slides every time the Web Page App plays. Any changes you make to the slides will be automatically updated each time the Web Page App loads. It’s that simple!
Click here to see the Web Page App now.
Or use Enplug’s Graphics and Video App with your Google Slides
Click on the slide show to view the steps that are described below:
[wds id=”6″]
1) Login to your Google account and go to DRIVE and then GOOGLE SLIDES
2) Click on START A NEW PRESENTATION
3) Enter text and add photos or other images
4) Login to your Enplug dashboard
5) Click on APPS
6) Click on GRAPHICS AND VIDEO APP
7) Click on UPLOAD
8) On lefthand side click on GOOGLE DRIVE
9) Click on the file (slide) you want — then SELECT ONE FILE — then UPLOAD
10) DISPLAY GROUPS automatically pops up — click screens you and want then SAVE CHANGES
11) Google slide will now display in your Enplug pre-set rotation with your other apps on the designated screens
Get creative with your employee Google Slides as part of your digital signage solutions — share little-known info or a funny comment to “humanize” your team members.
Click here to see the Graphics and Video App now.