Restaurants, bars, and other businesses everywhere are quickly replacing their printed menu displays with new digital menu software. In addition to the flexibility and general strikingness, a digital menu pays for itself, especially if you change your menus often. You can also add social displays to your mix to increase sales!

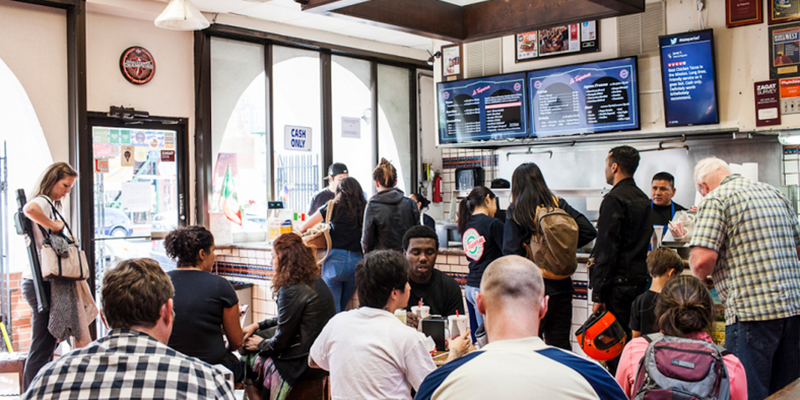
La Taqueria in San Francisco uses Enplug’s digital menus and social apps to increase their sales. Read more
I’ve worked with hundreds of business owners, ranging from restaurants to hotels, who have switched over to digital menus for better functionality and designs. Creating one is actually quite simple, and you can do it in less than an hour. By creating your re-usable menu template, you can conveniently experiment with different menu items, prices, and aesthetics for your customers. Put simply, a digital menu = more sales.
Time: 30 minutes
Requirements:
- A vector illustration application. I use Adobe Illustrator (free trial available), but you can also use free or cheaper alternatives such as Inkscape, or even Powerpoint or Google Slides for simple menus.
- To show your menu, you will need a digital display with digital signage software, such as Enplug. Check out our guide for installing a digital menu here.
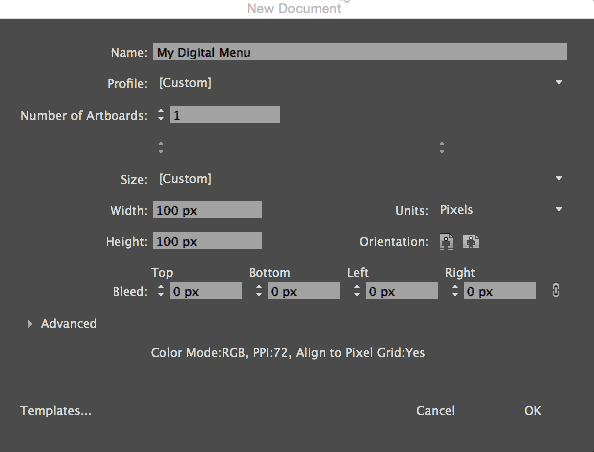
Step 1 – Create new project
Open Adobe Illustrator and create a new project (File > New). Enter your display’s resolution. Most landscape displays are 1920 pixels by 1080 pixels, or if portrait displays suit your business, they’ll likely be 1080 pixels by 1920 pixels. Also, under ‘Advanced’, ensure your Color Mode is RGB.
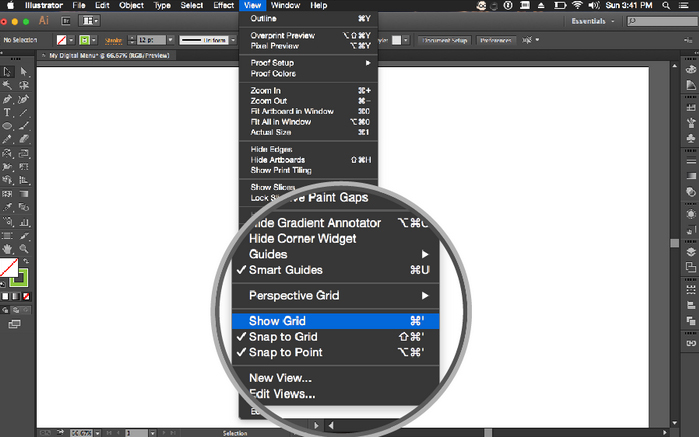
Step 2 – The grid
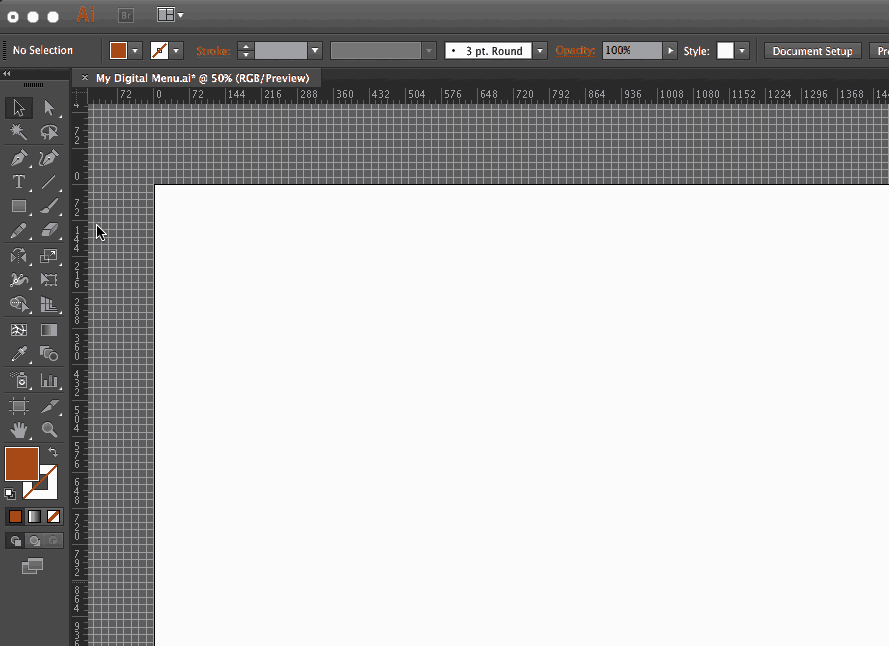
Now that we have a project to work with, we’ll set up our grid. This will allow us to easily build our menu items and keep everything aligned nicely. Note: Keep in mind if you’re using alternative software, your grid options will be different.
Turn on the grid by clicking View > Show Grid. Make sure ‘Snap to Grid’ and ‘Snap to Point’ are also enabled. This will allow us to build faster and more precisely.
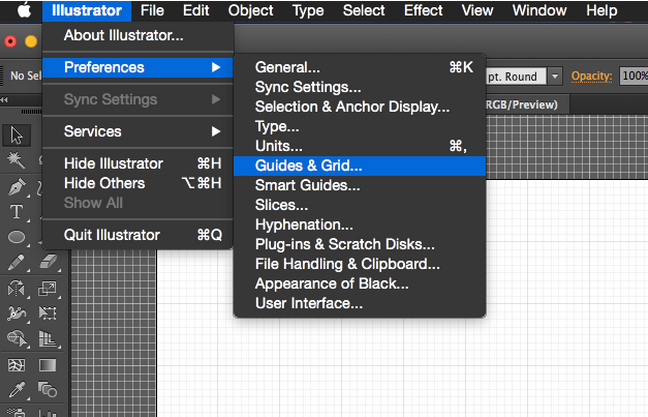
Now we’ll adjust the grid a bit to divide our menu nicely. Go to Guides and Grid options inside Illustrator Preferences.
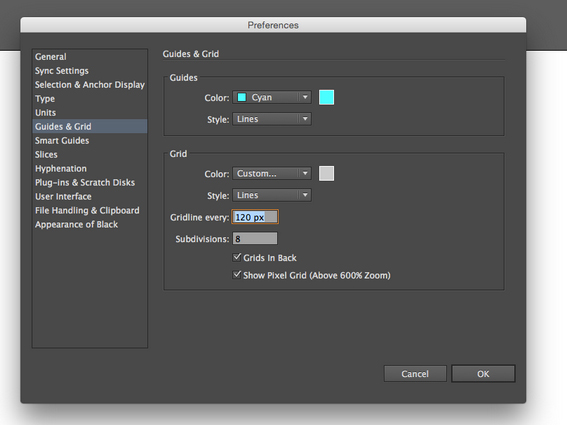
Adjust the gridline. We want a gridline every 120px. This gives us nicely divided sections to build upon.
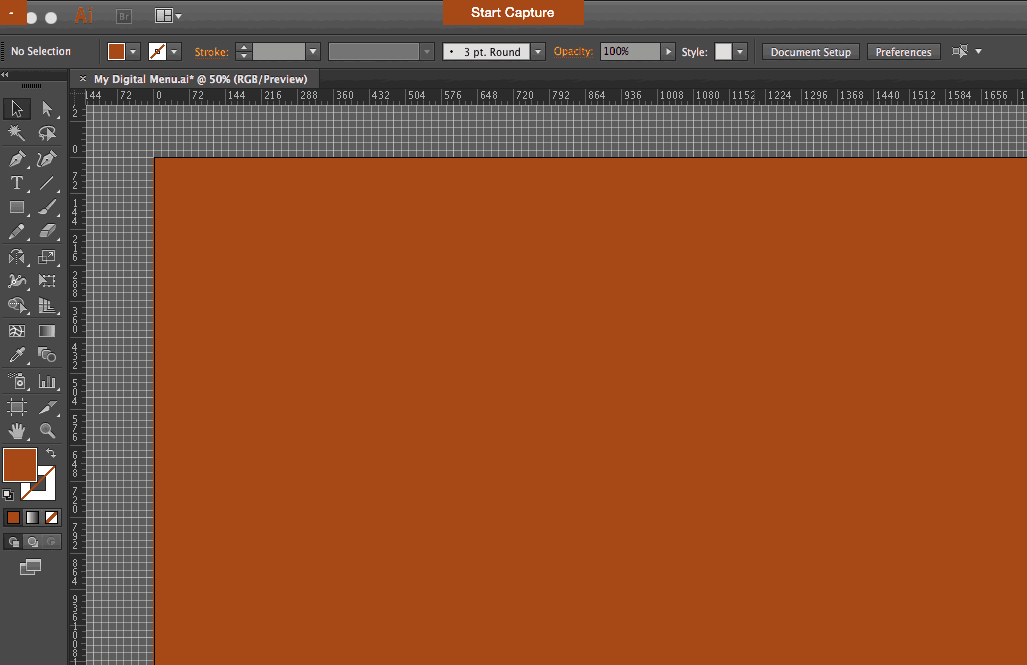
Step 3 – Background color
Now that we have a nice project and workspace ready, we can start building the menu. For my menu, I’m going to create a drink list for my brewery. I’ll start by creating a background color that matches my brand.
Tip: Use 3 colors or fewer for your menu’s primary colors. Any more than 3 becomes overwhelming for the eye and will likely look messy.
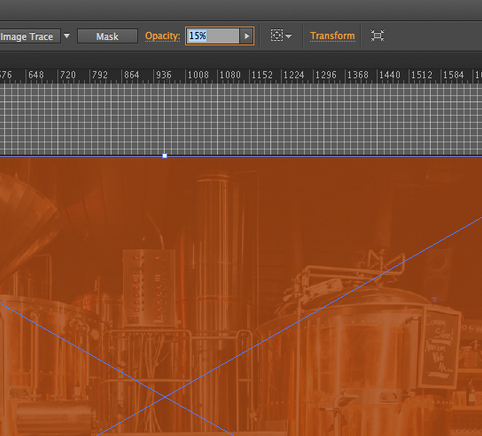
Step 4 – Add an image (optional)
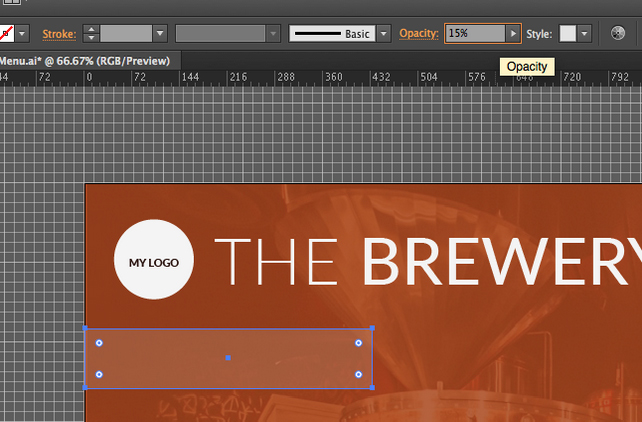
I’d like to add an image of a brewery to improve the look and feel of my menu. It will be partially transparent so it’s barely visible, but the little details make a big difference. Go to File > Place to add an image to our menu:
Now let’s resize the image to fit our menu (hold SHIFT while you drag to maintain the image aspect ratio, so it doesn’t look ‘stretched’).

Bring down the opacity (the lower the opacity is, the less visible the image will be). I want this to be very subtle, so 15% opacity looks about right to me.
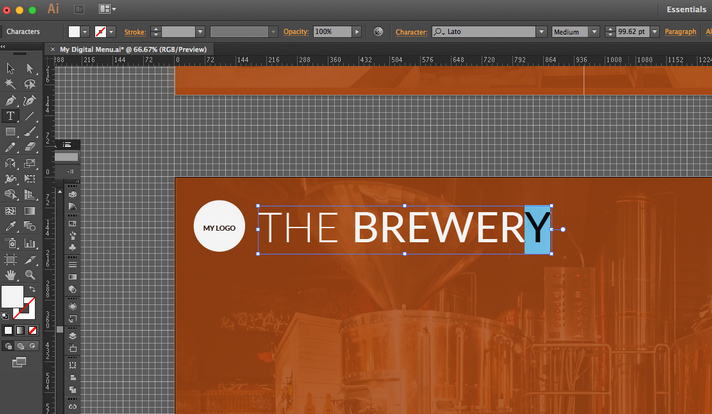
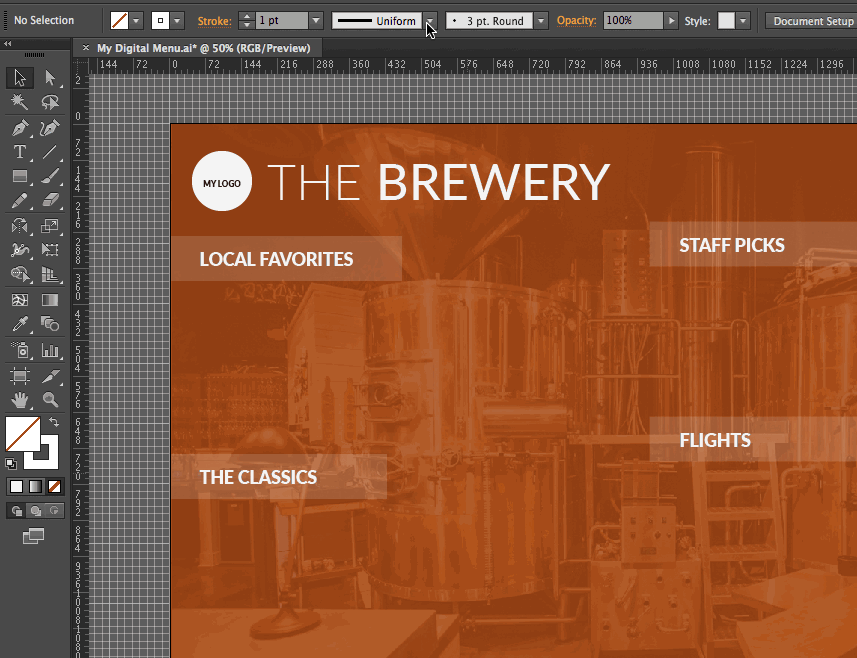
Step 5 – Add logo and typography
Now that we have a nice background to look at, let’s add a logo at the top. Notice how I leave a few squares of empty grid on the left and on top of the logo to give it some breathing room.
The font you use on your menu is important! I’m using Lato, a free open source font. If you’re looking for fonts, Google Fonts has hundreds you can use for free.
Tip: Make sure to leave some ‘breathing room’ between the edge of your menu and your actual menu items. This is also known as ‘negative space’, and is often easy to overlook. Without negative space, everything feels too big and ends up looking messy.
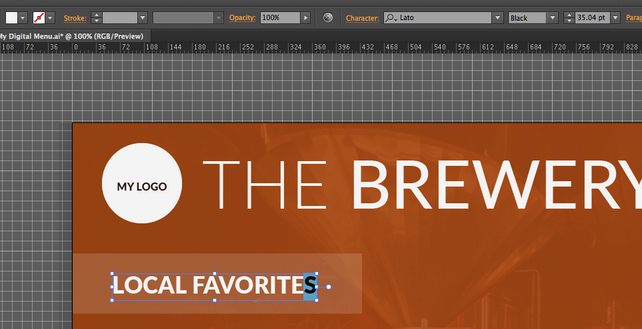
Step 6 – Menu ‘sections’ and dividers
My brewery has a few different types of beer. So I’d like to keep them organized into sections. Using the rectangle tool on the left toolbar, create a couple section dividers. You’ll notice the rectangle ‘snaps’ into place, thanks to our grid.
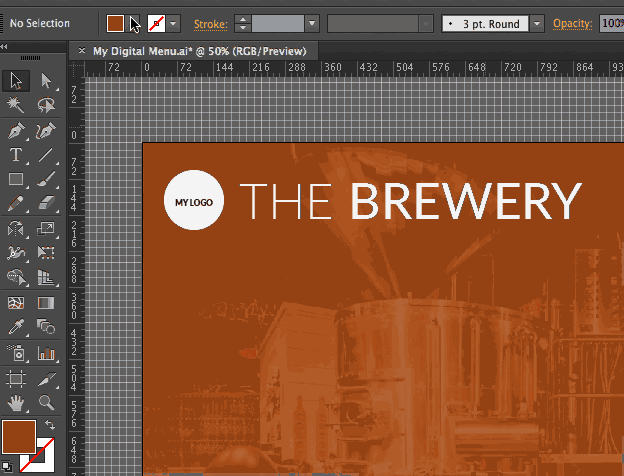
To make the sections look nice, I’ll apply 15% opacity to those rectangles as well. This makes them ‘quieter’ and will keep things balanced.
Now I’ll add the title of my sections and repeat the process for each section I need:
I’m going to create a divider to split my menu into halves, giving me more space. I’ll use the ‘line’ tool on the left toolbar, with a 1px white line.
Tip: To make sure the line is exactly in the middle of your menu, select it and press ‘Transform’ at the top. In the ‘x’ box, enter ‘1920/2’ (the total width divided by 2)
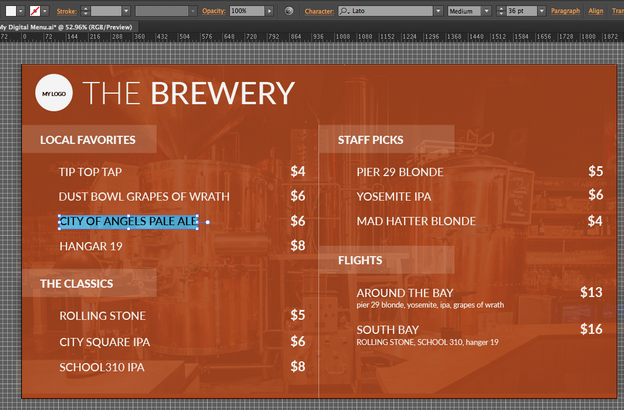
Step 7 – Menu items
Now that we have our structure, we can add the menu item text. It’s important that our text has hierarchy (the most important text should be biggest/boldest, and less important text should be smallest/thinnest).
For this reason, I made the logo ‘Lato Medium 100px’, the separator text ‘Lato Black 35px’, and the menu items ‘Lato Medium 36px’.
Tip: Use the grid to make sure everything lines up. You can also use the ‘Align’ tools at the top to let Illustrator double-check that everything is aligned and distributed properly.
Step 8 – Export & upload
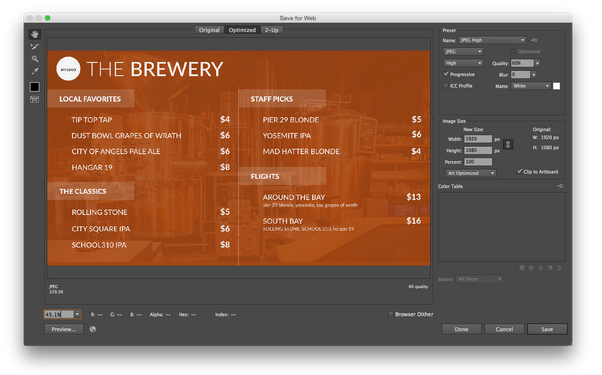
Our menu is ready to use! All we have to do is export it from Illustrator and upload it to our displays. In Illustrator, go to File > Save for Web. Double check JPEG High is selected (this is usually the best option for size/appearance) and click ‘save’.
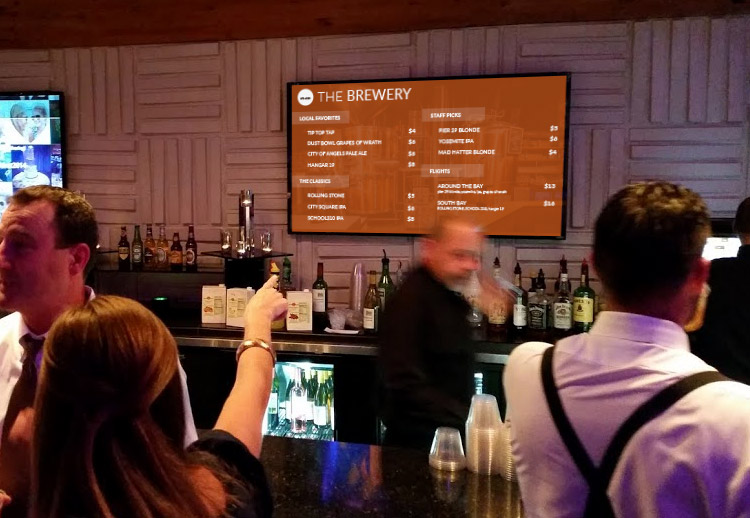
Using Enplug, I’ll just sign into my account and upload a new graphic to my digital menus. Within seconds, my new menu appears on my display.

And just like that, we’re ready to go! Don’t forget to save your Illustrator file so you can update your menu quickly later on.
Hundreds of businesses around the world use Enplug software to power their digital displays, connecting with customers and increasing sales. To learn more how Enplug can work for you, and to request a demo, click here.